Home » Flag Guidelines » How To Make Wooden Signs From A to Z – Get Ready To Create A Handcrafted Wood Sign

How To Make Wooden Signs From A to Z – Get Ready To Create A Handcrafted Wood Sign

by

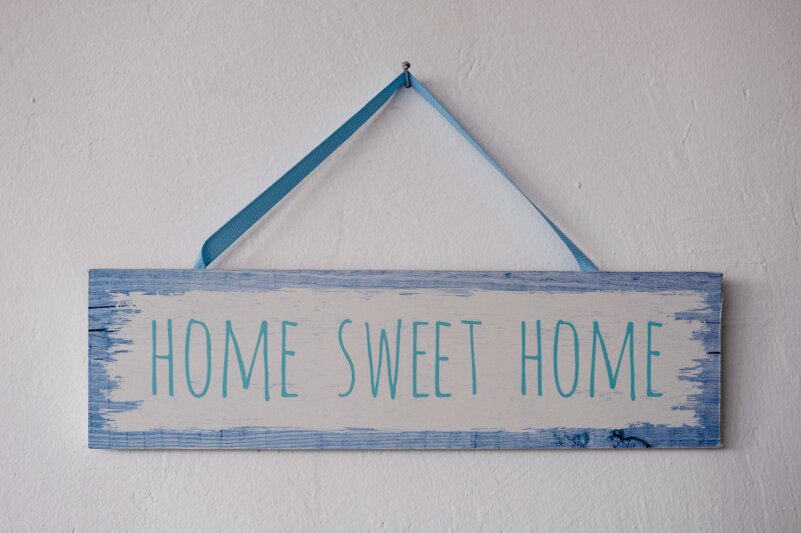
Recently wooden signs have become the most popular decorative accents. Many people hang these items on the wall of their living room, kitchen, and bedroom as ornaments. Wood signs also contribute to making a great addition to the door, the gate, or the windows of a house. People use them not only for decoration but also for other purposes such as delivering instructions, setting up rules, sending a message or help. Have you ever thought of making a beautiful wooden sign by yourself? If you’re coming up with homemade sign ideas but don’t know where to start, read on for the step-by-step tutorial to learn how to make wooden signs from start to finish!

Materials & Tools To Make Homemade Wood Sign

Materials

Before taking steps to make your personalized wooden sign, you need to prepare some basic supplies:

  • Wooden sign base. It can be plywood customized to the size you want
  • Grit sandpaper
  • Moist cloth or dry brush
  • Tape
  • Paintbrush or paint roller
  • Paint for the background of your sign: small craft paints, paint samples, and chalk paint
  • Stencil or a printed design for your wood sign
  • Sharpie oil-based paint pens/ paint pens 
  • 1 x 2 board in length you need for making the wood frame
  • Wood stain for the frame

Tools

There are some essential tools you may need to make custom wooden signs:

  • Hammer or Nail gun 
  • Finishing nail or Brad nailer
  • Hot glue
  • Circular saw or Table saw
  • Cutting machine

You may also like: House Flags

Instructions On How To Build A Wood Sign

To turn your homemade sign ideas into reality, follow the step-by-step guideline on how to make wood signs below!

Step 1: Choose your plywood

  • If there is a 2 x 4 or 2 x 2 plywood available in your house, use it for your wooden sign base. Cut to the size you want from the large board by a circular saw or a table saw. Unless you have any piece of wood around, go to the hardware store and get one. 
  • Birch plywood is the material highly recommended. It’s not pricey and easy to find in many shops. This plywood has a smooth finish, so you can cut it to any size you want.
  • You should choose the ¾ thick piece for making signs because the thinner plywood warps very quickly over time. Moreover, you can find it tricky to frame the sign made of skinny plywood.

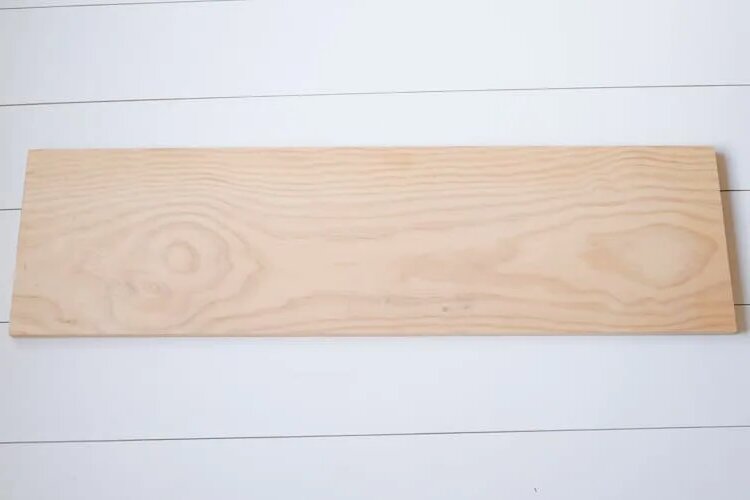
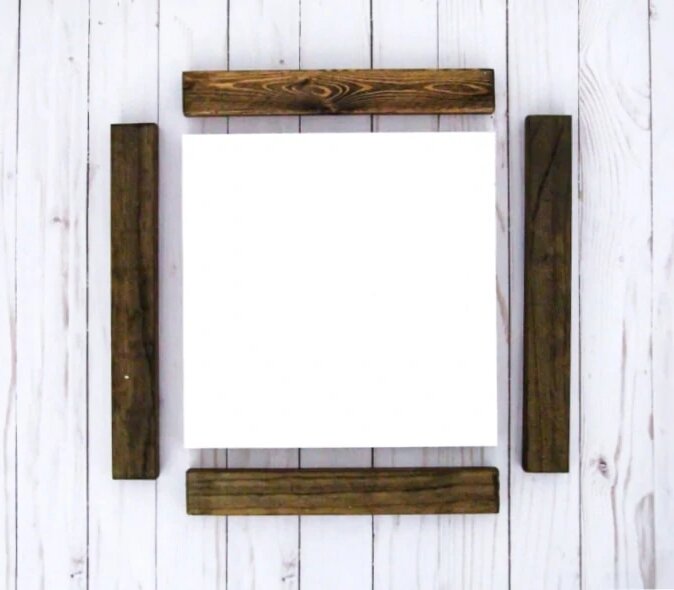
Instead of cutting the large board, you can buy blank signs at handmade shops. There are various blank sign choices for you, such as planked signs, framed signs, and signs in special shapes.

plywood
Source: angelamariemade.com

Step 2: Stain and paint your wood

  • Before you start staining and painting, use a piece of coarse-grit sandpaper to make sure the angles of your sign are smooth and the wood is free of splinters. You can also use a moist cloth or a dry brush to remove dust sticking on the plywood. 
  • After that, stain your base with a coat of paint. Allow this to dry for 30-60 minutes before moving on to the next stage. 
  • Choose your favorite color to paint your plywood. For small wooden sign crafts, you can paint with a paintbrush. For large sign crafts, use a paint roller to do more quickly. Apply one or two thin coats to the entire surface of your board.
paint wood sign
Source: angelamariemade.com

Step 3: Create your design

Now you’ve already had a plain wood sign. In this step, you will learn how to make the design of your sign. There are four different ways to produce it:

Stencil a sign

  • Not everyone has beautiful handwriting. So, using a stencil is an excellent method to have stunning letters for your sign. There are plenty of beautiful stencils at stores for you to pick up. Getting one stencil, then you don’t need to think of a great quote as it’s already made. There are several types of stencils available for stenciling signs. Choosing your ideal stencil type depends on how many signs having a similar stencil you want to create. 
  • Now it’s time to learn how to make wooden signs with stencils? There are three ways to do this: line up the stencil on the side, use vinyl, and use stencil film. Watch tutorial videos on Youtube to know more about how to make wood signs with stencils.   

Use a printed design for your sign.

  • Useful tools such as Canva and PicMonkey can support you in designing anything you want for your sign. 
  • After completing your personalized design, print it out and transfer it to your sign. You can apply a pencil transfer technique in this step.

Make a sign with a vinyl cutting machine.

How to make wooden signs with vinyl quickly and conveniently? 

In recent years, Silhouette and Cricut cutting machines have become common for sign-making. Both machines can cut designs out of sticky vinyl, making it simple to produce signs. You can create your design or get a ready-made one in online or offline stores. Then, use your Silhouette or Cricut to cut out the design to the form you want. The way you use vinyl letters is the same as how you use stencils. 

Hand-letter a sign

  • It will be so wonderful if you have beautiful handwriting. You can draw sayings for your wood sign by yourself. You should initially sketch your design with a pencil as you may make mistakes when drawing letters. 
  • After finishing your quotes, transfer them to your sign. Then you will have wooden signs with sayings.
home sweet home wooden sign
Source: rolanddg.eu

Step 4:   Paint over the letters on your sign

  • Sharpie oil-based paint pen is an ideal one to paint the letters on your sign. They enable you to paint smoothly, have good coverage, and write well on both stained and painted wood. 
  • You can use your paint pen to fill in the penciled draft if you’re hand-lettering or transferring a design to build your sign. If you’re stenciling a sign, you can simply use a paint pen instead of paint to do it.
oilbased paint pen

Step 5: Frame your wooden sign

  • Prepare a 1 x 2 pine board for your frame. 
  • Cut two pieces to fit the height and two pieces to fit the width of your wood sign.  
  • Make rough edges smooth with 220 grit sandpaper.
  • Stain your sign with the stain of your choice using a clean cloth. Once it has dried, put your plywood on the flat surface.
  • Use hot glue, a hammer/ a nail gun, and finishing nails to attach four pieces to the wood sign.  
  • Paint the frame with the color you want.
frame wood sign
Source: lovelyetc.com

Tips

  • If you want to cut down the cost, you should choose pine wood. You can get this wood easily at many online and offline shops, including local stores.
  • Get plywood for your sign from pallets. The pallets are everywhere and free. It helps you save costs and earn more profits. 
  • Remember to check for warp before choosing plywood.
  • Consider what kind of message the sign will deliver, then choose the suitable ratio. You can take advantage of the 2:1 or 3:1 proportion. These good ratios will bring an eye-pleasing look to your sign. 
  • Make your paint or stain rustic to help it have a good and natural look. You can use sandpaper to remove a little paint after applying it to the wood sign.
  • Attach a sawtooth hanger on the back of your wood sign. Sawtooth hangers help you hang your sign easily. These items are not expensive and can buy in many stores.

After learning the way to make a wood sign and some useful tips, let’s get the materials and tools, then be ready to make your personalized wood sign.  

Related questions

Redwood and Cedar are the best material to create weather-resistant wooden signs for outdoor decoration. Despite the high cost, their excellent quality is worthwhile. These two types of wood can survive harsh weather conditions and resist insect damage.

One of the effective methods to stencil on wood without bleeding is using Mod Podge. It is a kind of glue used as a sealer to prevent paint from bleeding. Apply a thin coat of Mod Podge to the stencil and wait until it’s dry thoroughly before turning to the next stage.

If you don’t need to create a sophisticated design, let’s try a Fiskars mixed media shear instead of using an expensive cutting machine. This shear only costs you $20 – $25 and is available at Amazon, Esty, etc. It can help you to cut all types of heat transfer vinyl.

Related Articles:

You May Also Like